> For the complete documentation index, see [llms.txt](https://cgtoolbox.gitbook.io/cgtoolbox-docs/llms.txt). Markdown versions of documentation pages are available by appending `.md` to page URLs; this page is available as [Markdown](https://cgtoolbox.gitbook.io/cgtoolbox-docs/actor-tags-manager/tool-documentation.md).
# Tool documentation
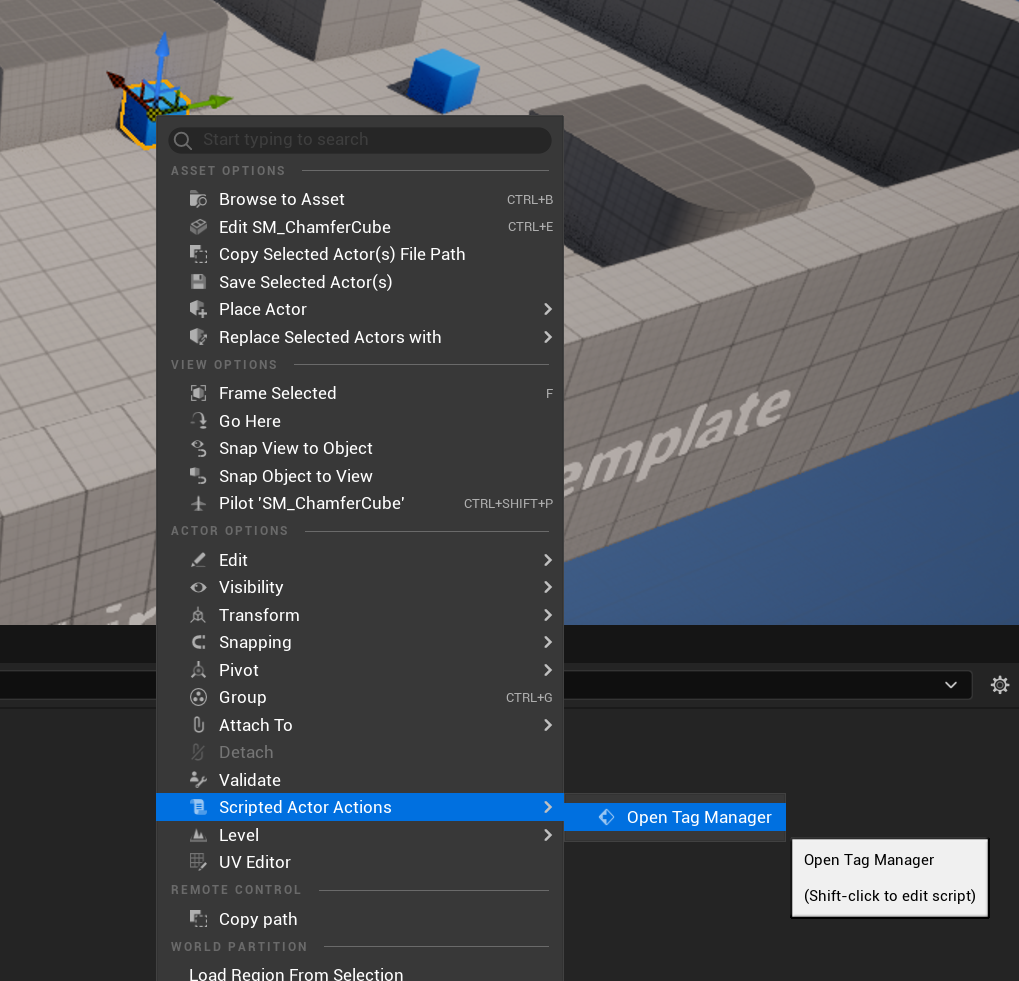
## Tags manager location
\
The utility widget is available as scripted actor action entry, you just need to right click on an actor(s) :arrow\_right: Scripted actor actions :arrow\_right: Open Tag Manager
\
By default, the tool will not find any available library and will ask you if you want to create one:
\
You can create it by clicking on .
{% hint style="info" %}
You can save the library anywhere in your content browser
{% endhint %}
{% hint style="info" %}
You can create manually a library by creating a new DataAsset of type "BP\_TagLibrary\_Base" \
\ \

{% endhint %}
## Library and tags creation
Once the library is created, you can add your tags and set their options.
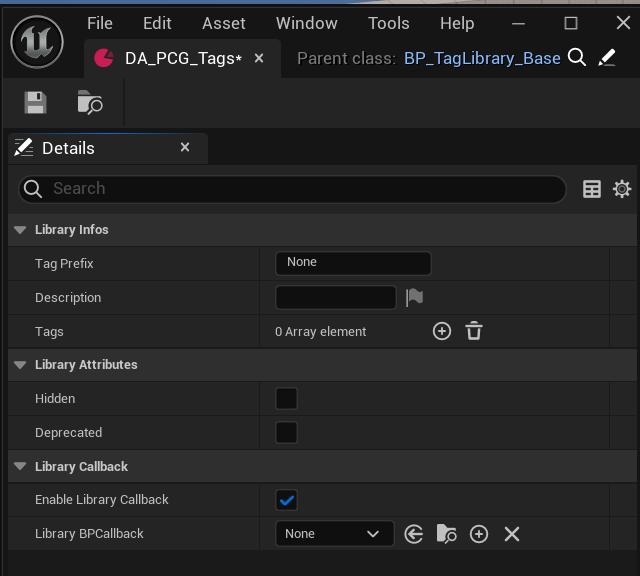
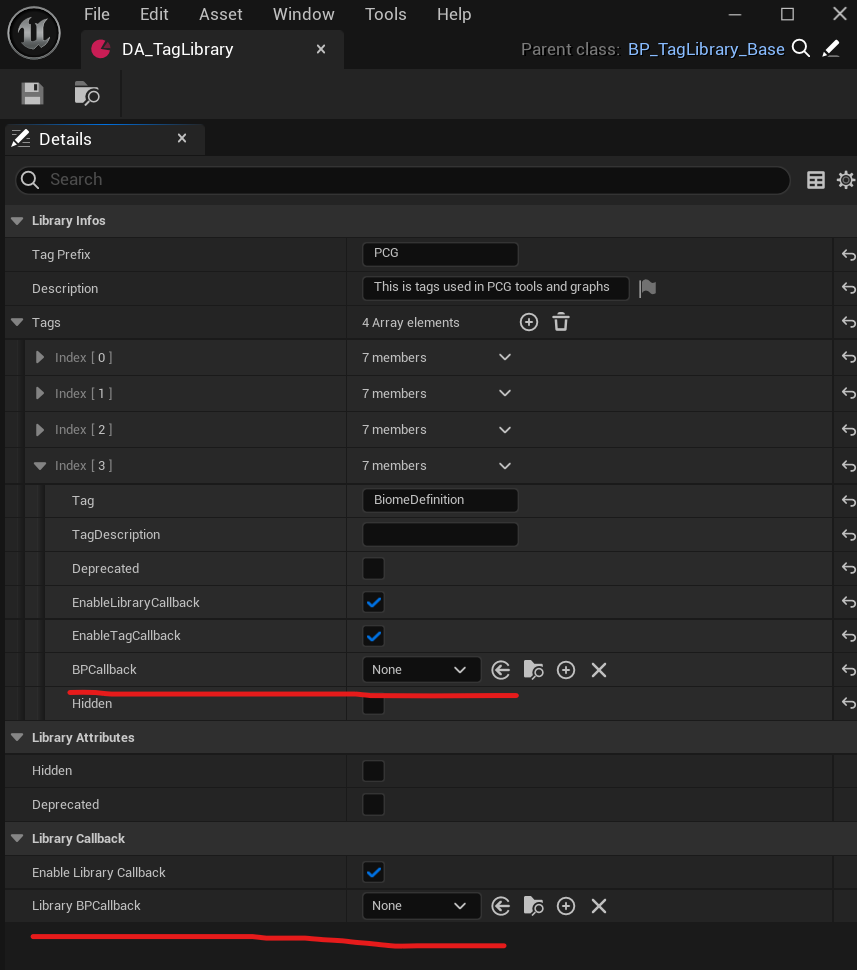
Here are the options for the library and its tags:
### **Library options**
**Tag Prefix**: (optional) A string prefix which will be prepend to any tag value of the library.\
\
**Description:** (optional) A string that describe the library, it will be displayed as a tooltip on the drop down menu of the libraries selection.\
\
**Tags:** The list of tags to be assigned in that library.\
\
**Hidden:** If True, the library will be hidden from the selection menu. (Unless “Show hidden” is checked)\
\
**Deprecated:** Will turn all the tags of the library to deprecated ( see tag options bellow for more infos ).\
\
**Enable Library Callback:** Enable the callback which will be run on any of the tags assignation / removal of this library.\
\
**Library BPCallback:** (optional) The callback blueprint to be executed. It must be of type *BP\_TagCallback\_Base* more on that bellow.\
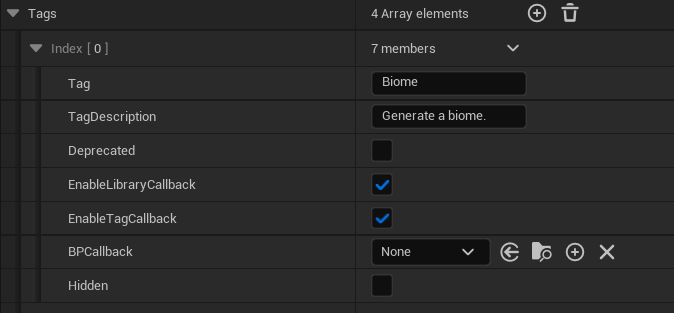
A tag and its options
### **Tag Options**
**Tag:** The actual tag value ( the string which will be used as tag ), library prefix might be added.\
\
**TagDescription:** (optional) The description of the tag, will be displayed as tooltip.\
\
**Deprecated:** Will turn the tag deprecated, that means it will still be shown in the list of tags, and can be removed from actors, but not added.\
\
**EnableLibraryCallback:** If True and a library callback is set, then it will be executed, otherwise the library callback will be skipped for that tag.\
\
**EnableTagCallback:** If True, it will execute the callback ( if any ) set on that tag. The tag callback will be executed ***after*** the library callback ( if any ).\
\
**BPCallback:** (optional) The callback blueprint to be executed. It must be of type *BP\_TagCallback\_Base* more on that bellow.\
\
**Hidden:** If True, the tag will be hidden from the tags list. (Unless “Show hidden” is checked)
{% hint style="warning" %}
After a library creation, you have to force refresh the tool state by clicking the refresh button:

{% endhint %}
***
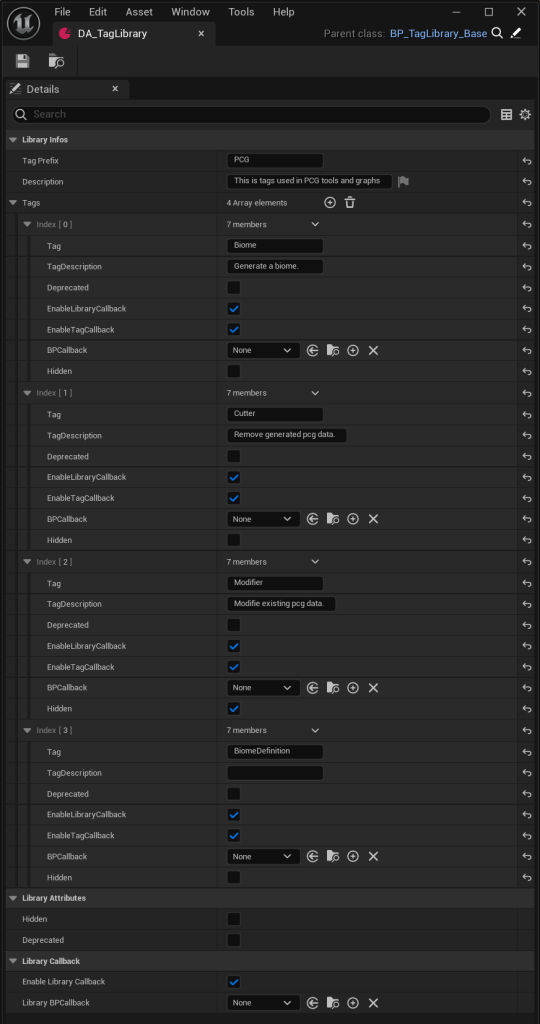
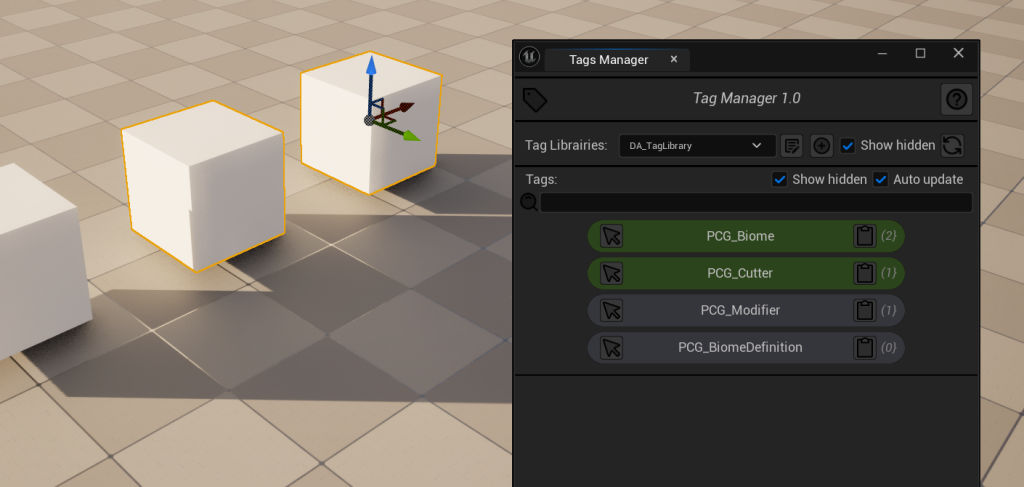
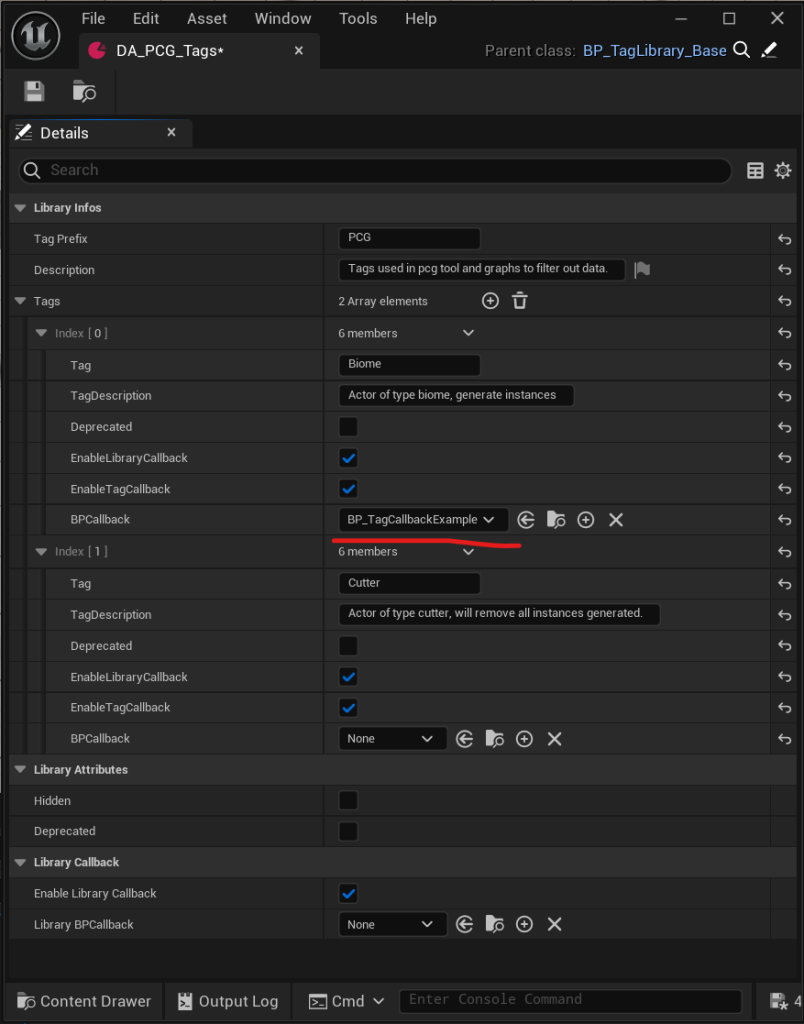
Example of a tag library and how it will be displayed:
A tag library data
The library displayed in the UI
***
## Assign / remove tags
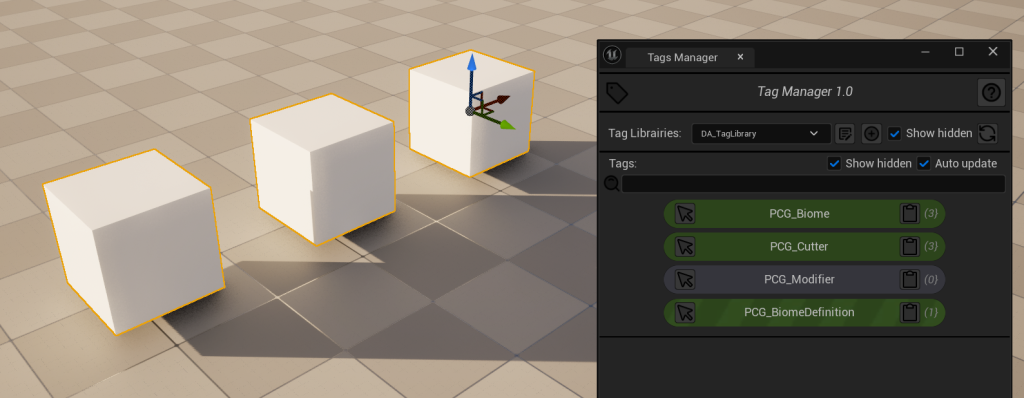
To assign or remove a tag, you just need to select one or multiple actors and click on the entry, it will turn green:
\
The remove a tag, just click again on the tag entry.
If you select multiple actors, and a tag is partially assigned, then it will appear with dark strips:
\
\=> If you click on a partially assigned tag like that, it will be assigned to the missing actor(s).
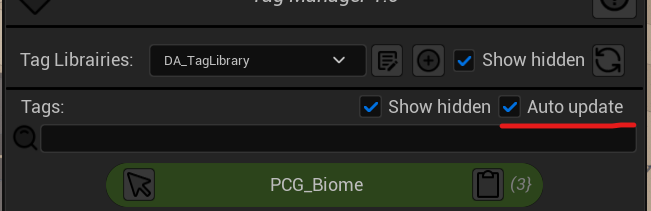
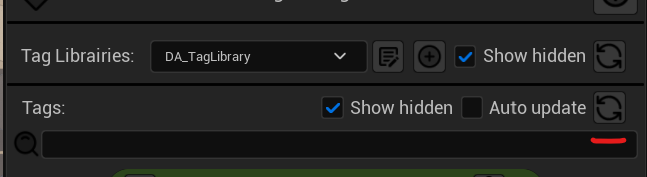
The refresh of the state of the tag entries (are they assigned or not on the current selected actors), can be done automatically, or manually with this option:
{% hint style="warning" %}
Auto refresh can slow down a bit the editor on massive selection.
{% endhint %}
|  |
You can also select the actors which have this tag assigned, on the whole level.
The right icon allow you to copy the tag’s value in the clipboard (Python plugin is necessary to see the icon, enabled by default on UE 5.4).
|
*Tag entry icons*
***
## Callbacks
\
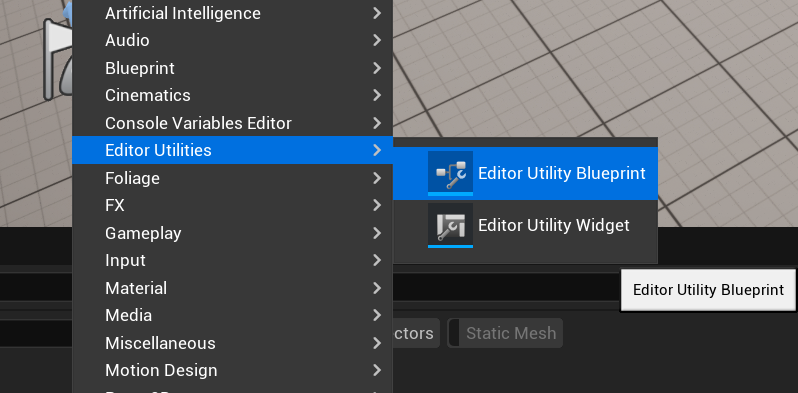
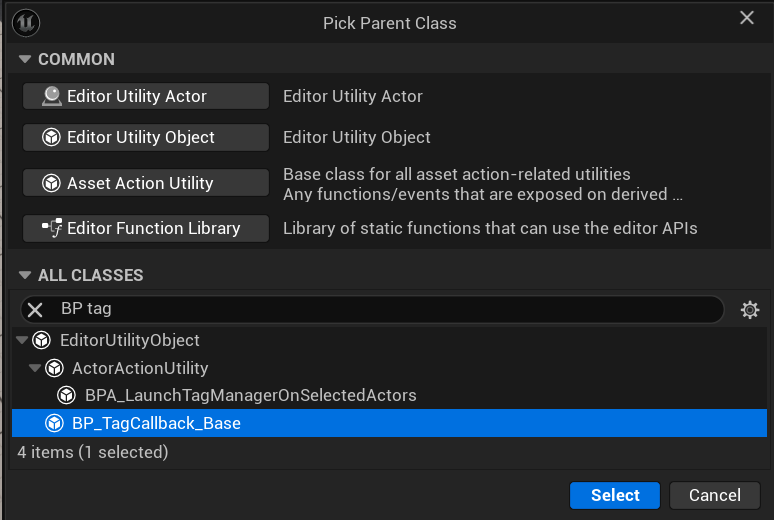
On tag assignation or removal, a callback can be executed. To do that, you have to create an editor utility blueprint which derives from the class: *BP\_TagCallback\_Base*.
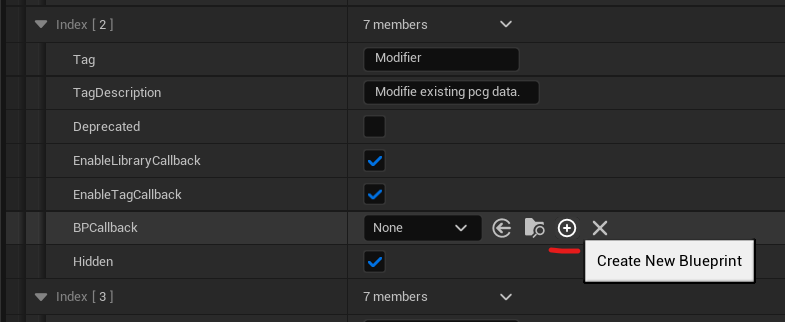
Or using this icon direclty from the tag options:
\
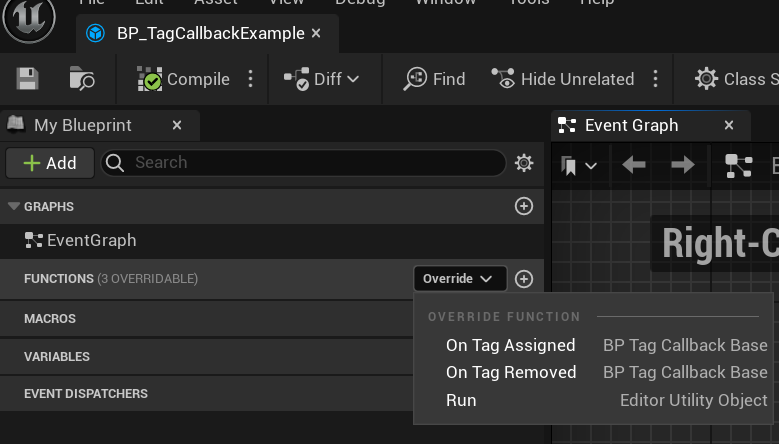
In this blueprint, you have to override the method you need, either “OnTagAssigned” or “OnTagRemoved” ( or both ):
\
The function has three inputs:
**Tag:** The struct of the tag with all its infos ( name, prefix, callback etc. )\
\
**TagLibrary:** The library the assigned or removed tag was stored in.\
\
**Actors:** An array of UActor, the actors affected by the tag assignation or removal.
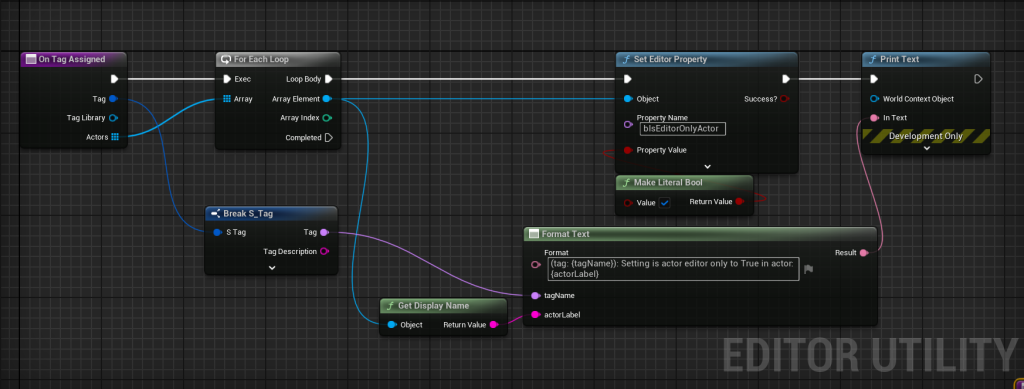
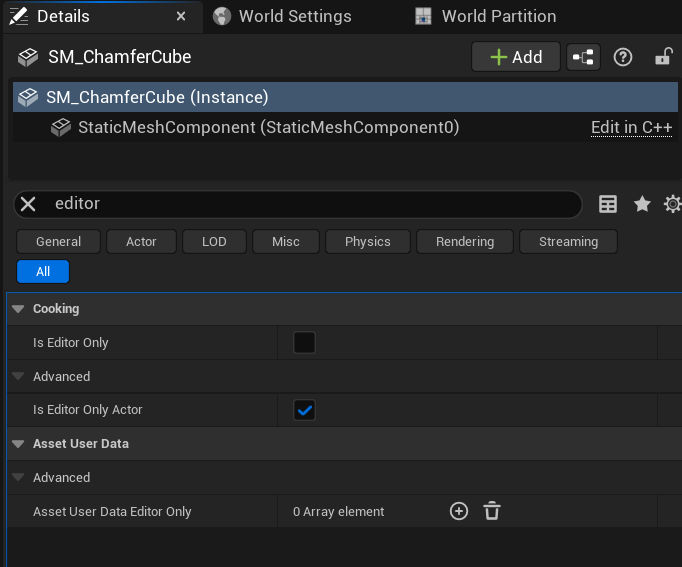
You can create any post process you need, for instance here, lets assign “Is Editor Only Actor” checkbox on the tag assignation:
\
Now in the library, let’s assign that BP callback to the tag “PCG\_Biome”:
\
If you now save and refresh the tags widget, when you assign the tag “PCG\_Biome” to an actor, you should see this in the output log:
\
And indeed the flag will be set accordingly:
A callback can be set at library level as well, this one will be executed **before** any tag callback.
***

 \

{% endhint %}
## Library and tags creation
Once the library is created, you can add your tags and set their options.
Here are the options for the library and its tags:
\

{% endhint %}
## Library and tags creation
Once the library is created, you can add your tags and set their options.
Here are the options for the library and its tags: